
Photodiodes are used with reverse bias. Most Arroyo Instruments controllers include integrated reverse bias, either as a software adjustable voltage or a fixed voltage, eliminating the need for an external bias supply. In the event internal bias is not available, it is possible to introduce the bias voltage externally using a power supply or battery.
Below is an illustration of a typical photodiode circuit. The bias voltage is introduced by connecting the anode of the photodiode to the negative terminal of the power supply, and the positive terminal of the power supply to the anode input of the measurement circuit.
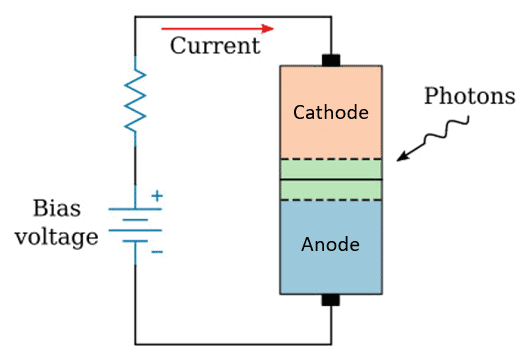
Because the power supply provides virtually zero current, a battery can often provide an excellent alternative to a more expensive bench supply and has the benefit of requiring no external power. The drawback of the battery option is that the only way to determine if the battery has died would be to periodically measure the voltage of the battery. This may or may not be feasible depending on your application.
Connecting the supply can be done by modifying the existing cable or building a short male/female cable that can be inserted between the instrument and the photodiode. Below is a photo of such a cable insert using an inexpensive battery enclosure such as this 2-cell holder from Digi-Key (3V bias with two AA batteries), or a 3-cell version (4.5V bias with three AA batteries). A similar type of cable could be made using an external power supply by simply replacing the battery case with leads to the power supply.
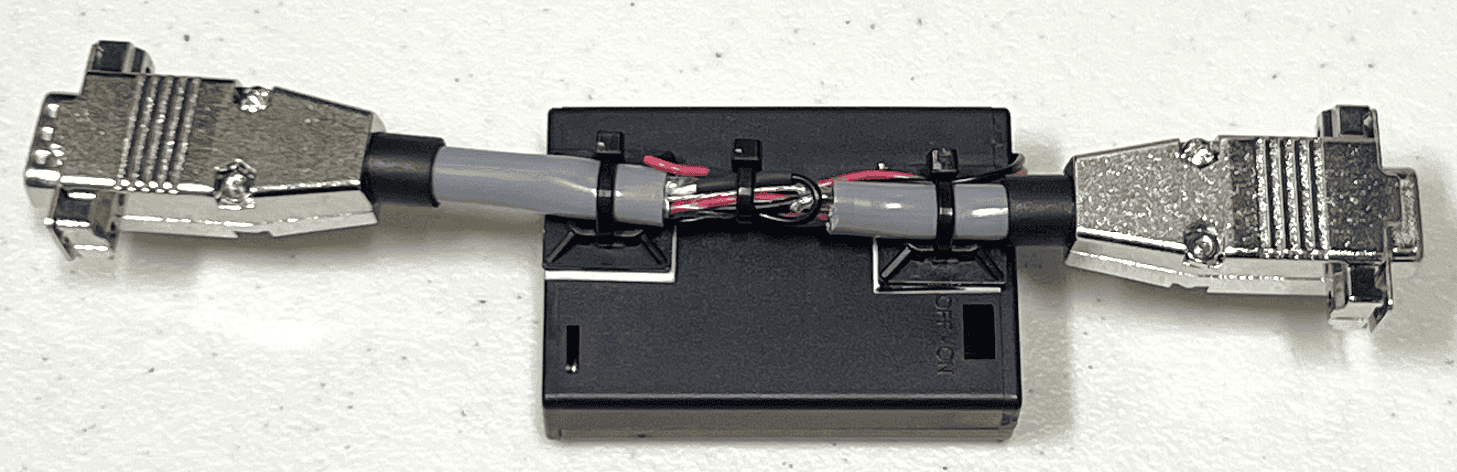
This cable is designed for Arroyo Instruments’ DB9 pin-out, but it could be applied to any type of connection.
Wiring in the power supply only requires breaking one connection; all others are wired straight through:
| DB9 Male Pin | DB9 Female Pin | ||
|---|---|---|---|
| 1 | Wire straight through | 1 | |
| 2 | Wire straight through | 2 | |
| 3 | Wire straight through | 3 | |
| 4 | Wire straight through | 4 | |
| 5 | Wire straight through | 5 | |
| 6 | Wire straight through | 6 | |
| 7 | Wire to V+ | Wire to V- | 7 |
| 8 | Wire straight through | 8 | |
| 9 | Wire straight through | 9 | |
| Shield | Wire straight through | Shield | |
Contact Arroyo Instruments for any additional help you might need with your application.